Keeping your vape device clean is one of the most important things you can do to ensure a consistent, enjoyable vaping experience. Residue buildup, old e-liquid, and general wear can all degrade performance over time, leading to muted flavors, reduced vapor production, and even hardware failure. Whether you use a simple pod system or a more advanced box mod, regular maintenance will extend the life of your device and save you money in the long run.
In this guide, we walk through the essential steps for cleaning and maintaining your vape device, covering everything from tanks and coils to batteries and connections.
I’ll admit it — for the first year of vaping, I never cleaned my device. Not once. I’d just swap pods on my XROS when the flavor got weird and figure that was good enough. Then one day the draw started feeling tight and the flavor was just… off. I popped the pod out of my XROS 4 Mini and the connection area was caked with dried juice. Fifteen seconds with a cotton swab fixed it, and the difference was night and day. That was my wake-up call. You don’t need to be obsessive about cleaning, but a few minutes a week keeps your vape performing like the day you bought it. Here’s everything I’ve learned from three years of figuring this out the hard way.
Why Cleaning Your Vape Matters
Every time you fill your tank or pod with e-liquid, trace amounts of the previous flavor linger on the coil, wick, and inner walls of the chamber. Over days and weeks, this residue accumulates and begins to affect the taste of your vape. You might notice a muted or muddled flavor, or even a burnt undertone that was not there before. Regular cleaning removes that buildup and restores the clarity of your chosen e-liquid.
Beyond flavor, cleanliness affects vapor production. Gunked-up coils have to work harder to heat the liquid, which draws more power from the battery and shortens its lifespan. A clean device operates more efficiently, delivering the same satisfying clouds with less strain on the hardware.
What You Will Need
- Warm water (distilled is ideal)
- Paper towels or a lint-free cloth
- A small bowl or cup
- Isopropyl alcohol (90% or higher) for deep cleaning
- Cotton swabs (Q-tips)
- A toothbrush with soft bristles (optional)
Cleaning the Tank
The tank is where e-liquid is stored and vaporized, making it the component most prone to residue buildup. Here is how to clean it properly:
Step 1: Disassemble the Tank
Remove the tank from the mod and carefully take it apart. Separate the glass section, the base, the top cap, and any O-rings. If your device uses a replaceable coil, remove that as well and set it aside.
Step 2: Rinse with Warm Water
Hold each piece under warm running water to remove loose residue. For a deeper clean, fill a small bowl with warm water and let the parts soak for 15 to 30 minutes. Distilled water is preferred because it leaves no mineral deposits behind.
Step 3: Dry Thoroughly
Shake off excess water and pat each part dry with a paper towel. Let the pieces air dry on a clean surface for at least an hour before reassembling. Any remaining moisture can dilute your e-liquid or cause gurgling when you vape.
Deep Cleaning (Optional)
If warm water alone does not remove stubborn residue, dip a cotton swab in isopropyl alcohol and gently scrub the inside of the tank and threading. Rinse with warm water afterward and allow everything to dry completely before use. Never use soap, as it can leave a residue that affects flavor.
Maintaining Your Coils
Coils are the heating elements responsible for vaporizing your e-liquid. They are consumable parts that need to be replaced regularly, but proper maintenance can extend their usable life.
When to Replace Your Coil
Most coils last between one and three weeks depending on how frequently you vape and the type of e-liquid you use. Sweeter e-liquids with high sugar content tend to gunk up coils faster. Signs that your coil needs replacing include:
- A persistent burnt or off taste
- Noticeably reduced vapor production
- A darkened or crusted coil when inspected visually
- Gurgling or spitting from the mouthpiece
Extending Coil Life
To get the most out of each coil, always prime it before first use by applying a few drops of e-liquid directly to the cotton wicking material. Let it sit for five to ten minutes before firing. This prevents dry hits that can permanently damage the coil. For more on matching e-juice to your device, read our guide to choosing the best e-juice. Additionally, avoid chain vaping (taking many puffs in rapid succession) as this does not give the wick enough time to re-saturate.
If you are looking for quality replacement coils and tanks, browse our Tanks and Atomizers collection. The GeekVape Z Sub Ohm SE Tank and Uwell Crown 5 Sub-Ohm Tank both feature easy-to-clean designs and widely available replacement coils.
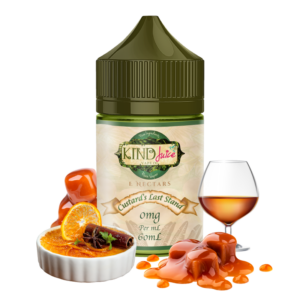
Quick story about coils and sweetened juice: my wife loves this candy-flavored e-liquid that tastes amazing but absolutely destroys coils. She was going through a new pod every four days and getting frustrated with the cost. I switched her to a less sweetened fruit blend from Kind Juice and her coils started lasting two and a half weeks. Same device, same usage, completely different coil life. If you’re burning through coils fast, it’s almost always the juice, not the device. I learned that the hard way after blaming my XROS for three straight months of rapid coil death. Turns out it was the dessert juice I was chain-vaping.
Caring for Your Battery and Mod
The mod is the body of your vape device that houses the battery and electronics. While it does not come into direct contact with e-liquid under normal circumstances, it still requires attention.
Cleaning the 510 Connection
The 510 connection is the threaded port where the tank screws into the mod. E-liquid can leak down into this area, causing a sticky buildup that interferes with conductivity. Use a dry cotton swab to clean the threading and the contact pin. If there is dried residue, lightly dampen the swab with isopropyl alcohol.
Battery Care
If your device uses removable batteries, inspect them regularly for any signs of damage such as torn wraps, dents, or corrosion. Damaged battery wraps should be replaced immediately, as exposed metal can cause a short circuit. Always store spare batteries in a protective case and never carry them loose in a pocket or bag.
For devices with internal batteries, avoid draining the battery completely before recharging. Lithium-ion batteries perform best when kept between 20% and 80% charge. Also, use only the charging cable that came with your device or a reputable replacement.
Check out the GeekVape Aegis Legend 3 Kit or Vaporesso ARMOUR ULTRA 100W Kit if you are in the market for a new mod or an upgrade. Browse all Starter Kits for more options.
Keeping Your Mouthpiece Clean
The drip tip or mouthpiece is the part your lips touch every time you vape, so it collects saliva, dust, and pocket lint over time. Remove it from the tank and rinse it with warm water regularly. A cotton swab can help clean the inside of narrower drip tips. Some vapers keep a spare drip tip in rotation so one can be cleaned while the other is in use.
Establishing a Maintenance Routine
The best approach to vape maintenance is to build it into a regular habit rather than waiting until performance degrades. Here is a simple schedule to follow:
- Daily: Wipe down the exterior of your device and mouthpiece with a dry cloth.
- Weekly: Rinse the tank with warm water and inspect the coil for discoloration.
- Every 1-3 weeks: Replace the coil based on usage and flavor quality.
- Monthly: Deep clean the tank, 510 connection, and battery contacts. Inspect battery wraps if using removable cells.
Common Mistakes to Avoid
- Using dish soap: Soap residue is extremely difficult to rinse away completely and will affect the taste of your e-liquid.
- Reassembling while wet: Moisture inside the tank dilutes your e-liquid and can cause spitting or gurgling.
- Over-tightening: When reassembling your tank, finger-tight is sufficient. Over-tightening can damage O-rings and threading.
- Ignoring leaks: A small leak today becomes a big problem tomorrow. If you notice e-liquid seeping from the base of your tank, check the O-rings and coil seating immediately.
- Neglecting the airflow: The airflow slots on your tank can collect dust and debris. Wipe them clean when you clean the rest of the tank.
My Sunday night routine now takes about five minutes: I pop the pod off my XROS, wipe down the connection with a dry cotton swab, give the mouthpiece a quick rinse under warm water, dry everything, and snap it back together. That’s it. Five minutes, once a week, and my device performs consistently all week long. I also keep a little ziplock bag of cotton swabs in my desk drawer at work for quick cleanups. It’s not glamorous, but it’s the reason my XROS 4 Mini is still going strong after fourteen months while my coworker’s pod system died after six because he never cleaned the contacts once.
Final Thoughts
A well-maintained vape device delivers better flavor, produces more vapor, and lasts significantly longer than one that is neglected. The cleaning process is straightforward and takes only a few minutes once you have the routine down. By investing a small amount of time each week into maintenance, you protect your investment and ensure every puff is as satisfying as the first.
Whether you are rocking a compact pod system with nicotine salt e-liquids or a powerful box mod, the principles are the same: keep it clean, replace consumables on schedule, and treat your batteries with respect. Your device will thank you with consistent performance session after session. Explore our full range of Devices to find the perfect setup for your vaping style.
Related Reading
Related Buying Guides
- Best Vape Tanks 2026 — tanks built for easy cleaning and long coil life
- Best Box Mods & Vape Mods 2026 — durable mods that stand up to regular maintenance
- Best Vape Starter Kits 2026 — low-maintenance kits ideal for hassle-free vaping